Here's another yummy recipe treat we want to share to you girls :)
For the sweet tooth, this one's for you :)
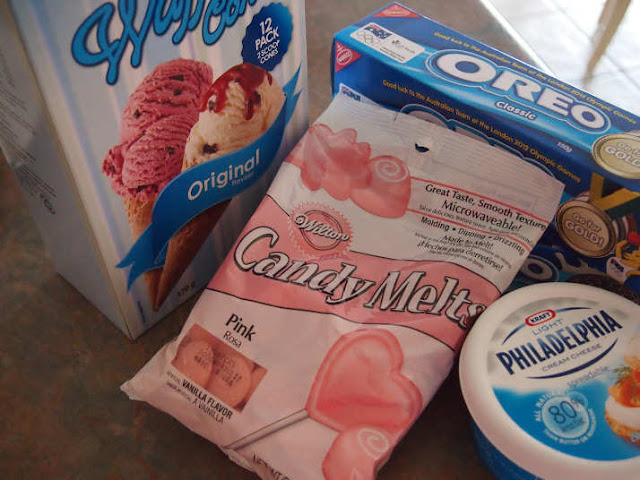
Here's what you'll need:
 |
| Have a food processor ready, You'll also need a sharp serrated knife and sprinkles |
How to do it?
 |
Step 1: Cut the cone on the right height of the stick with your serrated knife
Step 2: You'll see faint lines marked around your cone.
Step 3: Use your knife again and press a little bit harder until the top of your cone snaps off. (This may also require practice because it doesn't usually go out well the first time you do it)
Step 4: Start cutting off small holes until you reach the desired hole to fit your stick |
 |
If you are using 6 cones, at least use 2 packets of oreo cookies for this one, and have your food processor ready :)
Step 6: Put your cookies and work it out to crush them until they look like Step 7.
Step 7: it should look like this
Step 8: Add 90 grams of Cream Cheese, use your hands to mix well (so make sure you had those cute hands cleaned and prep'd)
Step 9: Mix well until it forms into a smooth dough that you can roll into a big ball as seen in the photo
Step 10: Form it into 6 even sized balls, you can use an icecream scoop fro this then roll in in your hand to form a small ball. |
 |
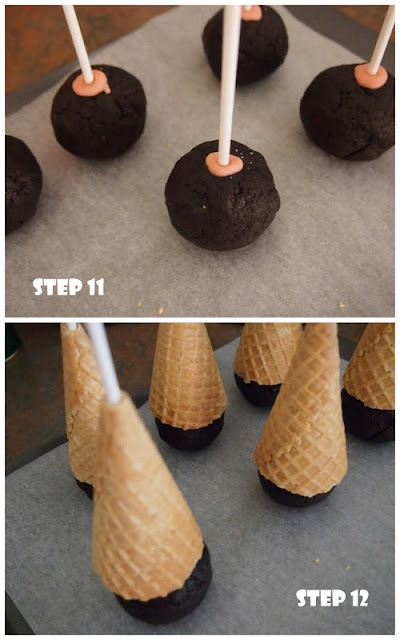
Step 11: Refrigerate for a little bit, while doing that melt a few candy melts, then dip the ends of the lolly pop sticks and push them in the center of the cake balls.
Pop this back to the fridge and let those candy melts set for about 15 minutes.
Meanwhile, melt down about three-quarters of the candy melts packet with about 10-15 grams of Copha (the Copha helps to make the candy melts a bit more runny for ease of dipping the cake pops later). Now here is an important tip: DO NOT overheat the candy melts!! They will become really gluggy and you won’t be able to use them AND you might burn yourself! Heat them up on a low heat and as soon as they’re all melted, take them off. Alternatively you can heat them up on a low setting in the microwave in 20 second bursts until they’re all melted.
Step 12: Place all of your prepared waffle cones over the cake pops. |
 |
Step 13: Now pour your melted candy melts into a deep bowl. You can use a glass measuring cup, it works really well for this.
Lift the waffle cone of one of the cake pops so that its tip is really close to the end of the lolly pop stick, then holding the top of the stick and the waffle cone to prevent it from slipping back down dip the cake ball into the candy melt. So the idea here is to dip the cake ball but not the waffle cone. (careful on the dipping so you won't burn your hand from the hot candy melts).
Step 14: Slide the waffle cone back down to meet the covered cake pop. The melted chocolate will make the waffle cone stick to the cake ball. If you have a styrofoam block handy you can now stick the bottom of the stick into it as far as it will go to help the waffle cone stay in place and not slide down. If you don’t have a Styrofoam block you might have to hold it in your hand for a little while and keep the waffle cone in place until the chocolate has set a little bit.
|
And there you have it girls! Enjoy and share it to your friends :)
♥Recipe Love: Ice Cream Cone Oreo Cake Pops♥
Shop online
Tiny Ichigo (kid's shoes) is also available at Club Princess stores at Bonifacio High Street and Mall of Asia
|


No comments:
Post a Comment